
Today’s housing market isn’t always friendly to sellers, and you need a competitive edge to sell your home for what it’s worth. If you’re selling a small space, you need a way to present it as a desirable home — and high-quality real estate photography can help.
However, getting the most out of small spaces isn’t simple, even for professional photographers. Every room poses its challenges. So, you’ll need to pay special attention to details and create professional photos to achieve your desired results. That’s why we’ve presented a few practical tips for anyone who wants to use real estate photography while selling a property.
Secure Reliable Help to Streamline Your Photoshoot Preparation
You’ll need plenty of time to prepare your space to get the most out of a photoshoot, so don’t underestimate how big of a job this is. In the process, you’ll have to remove clutter and non-essential items from the area you plan to shoot.
That will probably take too long if you decide to do it yourself. Therefore, consider working with a professional moving and storage company to simplify the process. However, make sure you hire trustworthy assistance for this job. When you choose a moving and storage company, consider how you’ll gauge their reliability. Check that they have things like:
- Proven experience and expertise,
- A wide range of moving and storage services,
- Positive customer reviews.
If you’re selling your own home and transporting personal furniture and items, hiring people you can trust becomes even more important. They need to safely and efficiently remove or temporarily store anything you need.
After the area is cleared, a photographer can easily capture the best features of every room and present the whole property at its best. And if you hire professional movers to help you, removing furniture and other items won’t cause you a headache.
Maximize Space with Strategic Composition
To make a small room look bigger, you’ll need to learn about composition techniques in photography. Don’t worry; you won’t need a 3-month-long course — a few key elements will do the trick for real estate photography.
For example, you need to learn to use wide-angle lenses adequately. You can capture a broad view even in a small room with them. However, if you’re not a professional, you must take care of things from various angles. When the lens angle is too wide, the photo of a room can easily get too distorted.
You want the room to appear somewhat bigger, not double its size. Potential buyers may feel misled if your angle is too wide. To avoid damaging your reputation, carefully choose the photos you’ll use to present the property.
Other Ways To Maximize Space
Besides wide angles, there are other ways to make your room appear more spacious. For example, you can change the position of your camera.
When you place the camera in the room’s corners, you can maximize depth perception. As a result, anyone looking with the naked eye will think the room is slightly larger than it is in real life. Like the wide angles, you don’t want to overdo this either — always ensure the photo looks natural.
Also, effective real estate photography isn’t only about taking great natural shots. It’s also about how you’ll arrange the photos on your listing.
If you create a slideshow with photos in the right order, you can create a visual pathway each potential buyer will follow. As a result, they’ll be able to visualize the flow of the space by looking at the pictures.
Use Natural and Supplemental Lighting
Lighting can significantly impact your room’s appearance in photos, especially in small spaces. And since photos on listings are your home’s digital curb appeal, this is important.
When considering lighting, remember this: regardless of what artificial lighting you install, there’s no getting around one fact: every room looks best in natural daylight.
Nothing opens up a space like natural light, so try to capture this in your real estate photography. Schedule your photoshoot during the daytime, specifically when sunlight hits the room.
Ideally, your small space will have large windows that allow plenty of natural light to enter the room. Since this isn’t always an option, you may also need to make the most of artificial lighting.
Most professional photographers have portable lighting kits as essential gear. Placing them strategically in the right corner can brighten up your space for the photo. However, this is another technique you should use carefully. You don’t want to create direct, harsh light that can shrink a room — or change its appearance so much that it doesn’t look like the real thing in the photos.
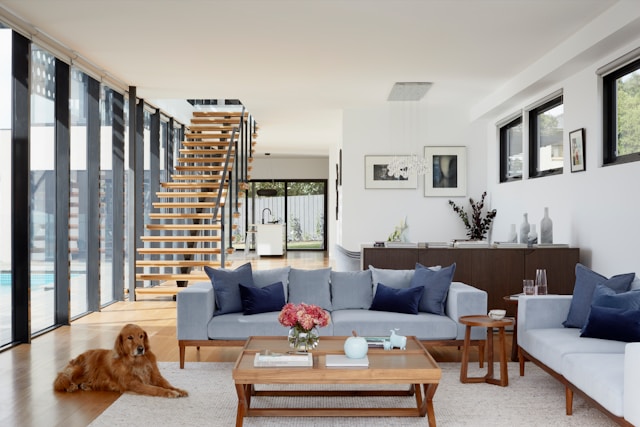
Clever Staging Techniques in Real Estate Photography
You need to stage a small space properly to make it more attractive. Sure, removing excess clutter is important, as we’ve discussed. But you must stage the area by placing some furniture and decor. After all, it must look like a realistic, lived-in property — especially if you’re marketing a rental.
That also allows you to create more space with strategic furniture placement. If you place smaller furniture properly, you can create the illusion of more space. Choose your staging furniture carefully — it must be proportional to the room’s dimensions. That way, it won’t overwhelm the space.
Don’t Skimp on Post-Processing
Don’t kid yourself — most professional photos you see anywhere today are heavily edited. Post-processing is essential to real estate photography because it lets you refine images. While editing, you can put the finishing touches on these photos to make the property stand out in a competitive market. That is essential since homes with professional photos are sold up to 60% faster than those listed with amateur images.
Of course, you must also be careful not to mislead buyers here. Don’t overdo it and completely alter the appearance of the property. Instead, slightly change the color balance, brightness, and contrast to make the small space appealing.
Conclusion
Effective real estate photography can help you sell any home, especially a smaller one. However, don’t expect this to take only a few minutes if you’re not a professional photographer. Creating professional photos of your property takes careful preparation, and it’s best handled by experts who know what they’re doing.